Step-by-Step Guide: How Do You Take a Cutting from a Hydrangea for Successful Propagation
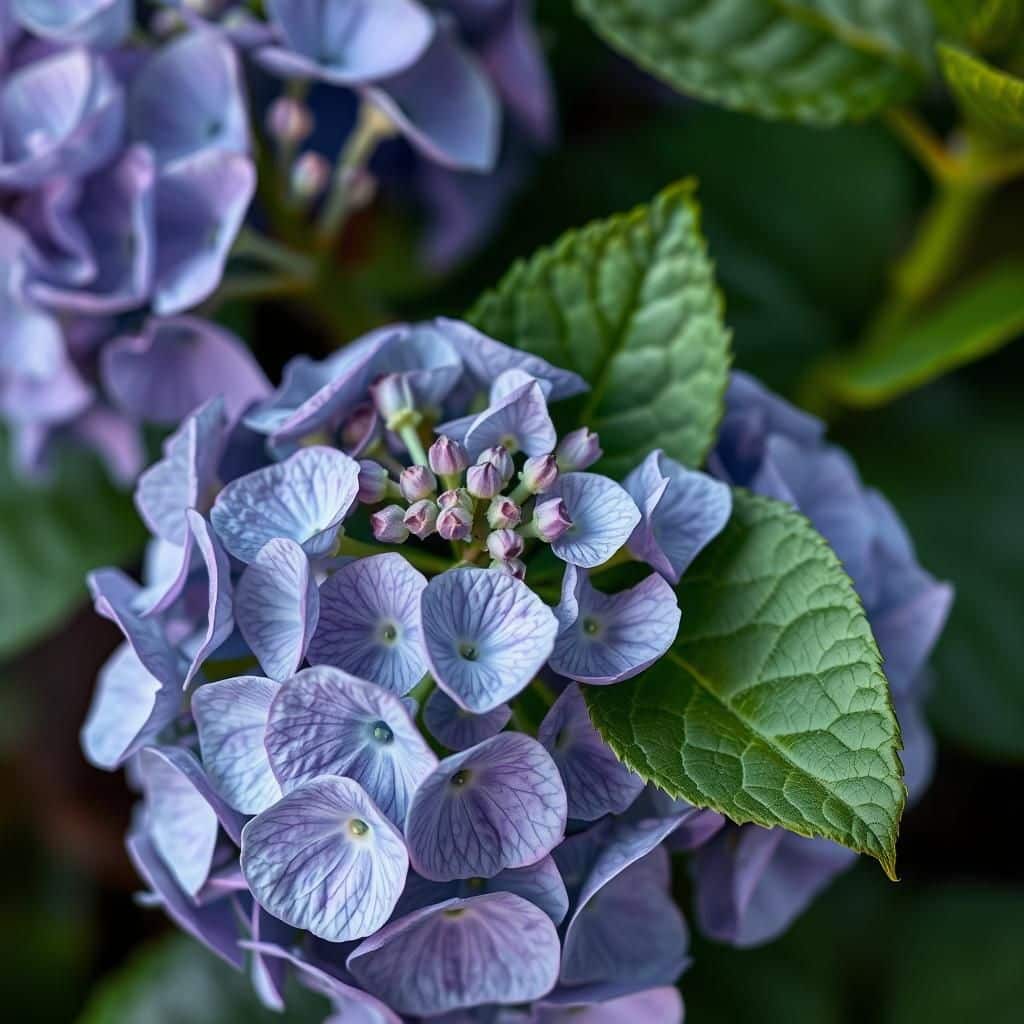
Hydrangeas are beloved for their stunning blooms and versatility in garden design. Propagating these beautiful plants through cuttings is a rewarding process that allows gardeners to expand their collection without purchasing new specimens. This step-by-step guide will walk you through the essential techniques for taking cuttings from a hydrangea, ensuring a higher success rate for your propagation efforts. From selecting the right time and tools to understanding the best practices for rooting, this article will provide you with everything you need to know to grow healthy hydrangeas from cuttings. Get ready to cultivate your green thumb and enjoy the satisfaction of propagation!
How to Take a Cutting from a Hydrangea
To successfully take a cutting from a hydrangea, you should begin in late spring to early summer when the plant is actively growing. Select a healthy stem that is about 4 to 6 inches long and ensure it has a few sets of leaves. Using a sharp, clean knife or scissors, cut the stem just below a node, which is the point where leaves attach to the stem. Remove the lower leaves, leaving only a couple at the top to reduce moisture loss. Dip the cut end in rooting hormone to promote root growth, then plant the cutting in a pot with well-draining soil. Water it thoroughly and cover it with a plastic bag to maintain humidity. Place the pot in a warm, bright location but out of direct sunlight. After a few weeks, you should see roots developing.
Choosing the Right Time for Cuttings
The ideal time to take cuttings from a hydrangea is during the late spring to early summer, as the plant is in its active growing phase. This timing increases the chances of the cutting successfully rooting because the plant is filled with vigor and energy, providing the necessary hormones for growth. Be sure to take cuttings on a cloudy day or in the early morning when temperatures are cooler to prevent stress on the plant.
Selecting Healthy Stems
When selecting stems for cuttings, look for healthy, robust stems that have not yet flowered. Stems that are too woody may not root effectively, while those that are too soft may lack the strength needed for successful propagation. Aim for stems that are green and flexible, as these are more likely to produce new roots and thrive when planted.
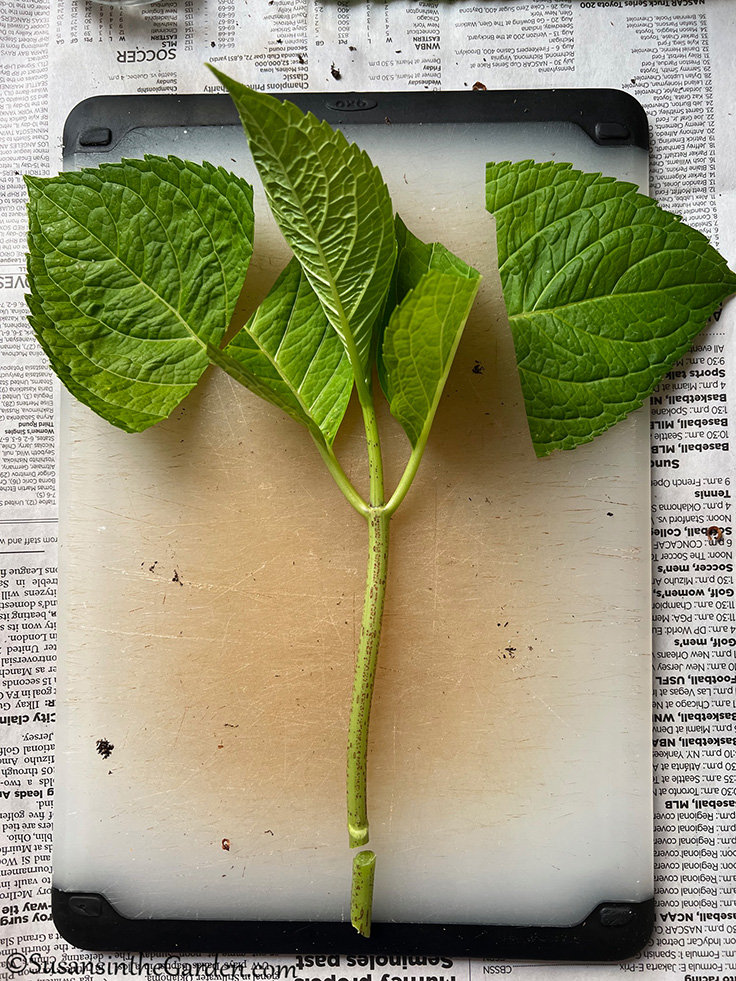
Preparing the Cutting
Prepare your cutting by making a clean diagonal cut just below a node, which is where the leaves emerge. This cut increases the surface area that will come into contact with the soil and encourages rooting. After cutting, remove any leaves from the lower half of the stem to prevent rot and conserve moisture. It’s also beneficial to dip the cut end into rooting hormone, as this can significantly enhance the chances of successful rooting.
Planting the Cutting
Plant the prepared cutting in a pot filled with a mixture of potting soil and perlite or sand for good drainage. Use your finger or a pencil to make a hole in the soil before placing the cutting in it, ensuring that the cut end is buried deeply enough to support stability. After planting, water the cutting well, allowing the excess water to drain out, and ensure the soil remains moist but not soggy.
Creating the Right Environment
To create a conducive environment for rooting, cover the planted cutting with a clear plastic bag or a propagator dome to maintain high humidity. This mini-greenhouse effect helps prevent moisture loss from the cutting while it develops roots. Place the setup in a warm location with indirect sunlight, ensuring that it receives adequate light without direct exposure, which could cause overheating or scorching.
| Step | Description |
|---|---|
| Select the Cutting | Choose healthy stems in late spring or early summer. |
| Prep the Cutting | Make clean cuts and remove lower leaves. |
| Apply Rooting Hormone | Dip the cut end to stimulate root growth. |
| Planting | Place the cutting in well-draining soil. |
| Humidity Control | Cover to maintain high humidity for the cutting. |
When should you take hydrangea cuttings?
To successfully propagate hydrangeas, it's important to know the right timing for taking cuttings. The ideal time to take hydrangea cuttings is during the late spring to early summer months, typically between May and July, when the plant is actively growing. This period allows the cuttings to root effectively due to the warm temperatures and longer daylight hours, which promote root development.
Choosing the Right Type of Cutting
When taking cuttings, consider the type of hydrangea you are working with, as different varieties have varying characteristics. There are generally two types of cuttings you can take:
See also: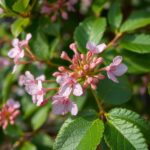
- Softwood Cuttings: Best taken in late spring and early summer from new growth that is still flexible.
- Hardwood Cuttings: Taken in late fall or winter, typically from established, woody stems once the plant has gone dormant.
Timing for Softwood Cuttings
For most hydrangea types, softwood cuttings are the preferred method due to their higher success rate. During this time:
- Observe New Growth: Look for healthy new shoots that have recently matured but are not yet hardened.
- Choose Healthy Plants: Select cuttings from vigorous, well-established plants to ensure robust growth.
- Check Weather Conditions: Avoid taking cuttings on extremely hot or dry days to reduce transplant shock.
Preparing the Cuttings
After selecting the right cuttings, proper preparation is crucial for successful rooting. Follow these steps:
- Use Sharp Tools: Always use clean, sharp scissors or pruning shears to make a clean cut.
- Cut to Size: Aim for cuttings that are about 4 to 6 inches long, including a few sets of leaves.
- Remove Lower Leaves: Strip the leaves from the bottom half of the cutting to reduce moisture loss and encourage root growth.
Rooting the Cuttings
Once the cuttings are prepared, it's time to root them. Consider these options:
- Use a Rooting Hormone: Dipping the cut end in rooting hormone can enhance root development.
- Planting Medium: Choose a well-draining potting mix or perlite to ensure good aeration and water drainage.
- Caring for the Cuttings: Keep the cuttings in a humid environment, either by covering with a plastic bag or placing them in a mini greenhouse.
Monitoring Growth Progress
Once you have planted the cuttings, monitoring their progress is essential. Here’s what to watch for:
- Watering Needs: Keep the soil consistently moist, but avoid overwatering which can lead to rot.
- Light Conditions: Provide bright, indirect light to prevent scorching but still promote growth.
- Timing for Transplanting: After a few weeks, check for root development by gently tugging on the cuttings. Once they are established, they can be moved to larger pots or directly into the garden.
Where do you cut the stem of a hydrangea?
To cut the stem of a hydrangea, you need to select the appropriate location based on the specific type of hydrangea and the season. The best practice is to make cuts near the nodes of the stems, which are the small bumps or nodes from which leaves or flowers grow. Generally, the cut should be made above a node and just below the flower to encourage new growth and ensure that the plant remains healthy.
Understanding Hydrangea Types
The first step in cutting hydrangea stems is to understand the different types of hydrangeas, as they may require different cutting techniques.
- Macrophylla (Bigleaf Hydrangeas) - Best pruned after flowering in late summer or early fall.
- Paniculata (Panicled Hydrangeas) - Can be pruned in late winter to early spring.
- Arborescens (Smooth Hydrangeas) - Often cut back severely in late winter to promote new growth.
Tools Required for Cutting
Having the right tools is crucial for making clean and effective cuts.
- Sharp Pruners - Ensure they are well-maintained to avoid crushing the stems.
- Gloves - Protect your hands from thorns or rough bark.
- Disinfectant - Clean your tools to prevent the spread of diseases between plants.
When to Cut Hydrangeas
Timing is a key factor in the health of your hydrangea when cutting stems.
- Post-Bloom Pruning - For blooming varieties, prune after flowers have faded for optimal results.
- Spring Pruning - Many species can be pruned in spring before new growth begins.
- Avoid Late Fall Cuts - Cutting too late in the season can damage new buds.
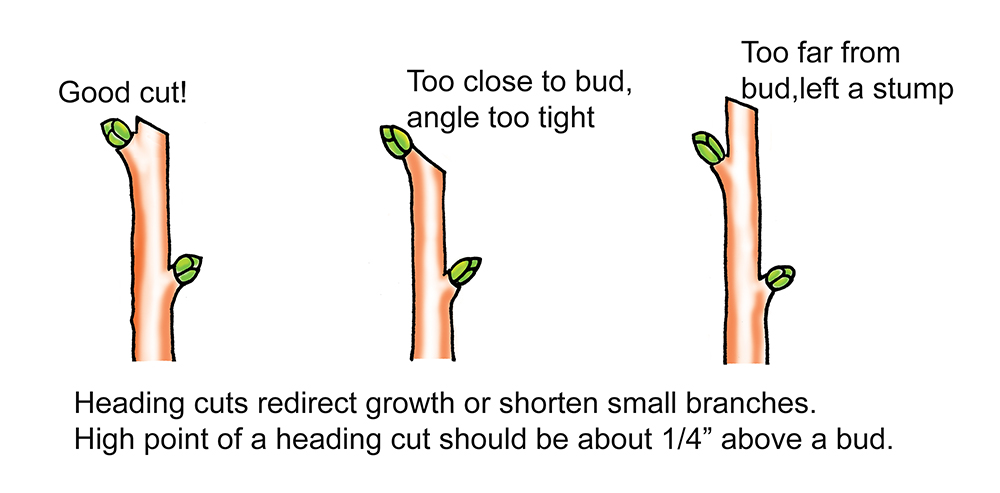
How to Make the Cut
Learn the best technique for making cuts on hydrangea stems to promote healthy growth.
See also:
- Angle the Cut - Make an angle cut to prevent water from pooling on the stem.
- Leave Node Above Cut - Always cut just above a healthy node to encourage new growth.
- Observe Plant Health - Ensure you are cutting healthy stems and removing any dead or diseased parts.
Aftercare for Hydrangeas Post-Cutting
Taking care of your hydrangeas after cutting is essential for their recovery and growth.
- Watering - Ensure adequate moisture following pruning.
- Mulching - Apply a layer of mulch to conserve moisture and suppress weeds.
- Fertilizing - Consider using a balanced fertilizer to promote new growth.
When you cut hydrangeas, do you put them in water?
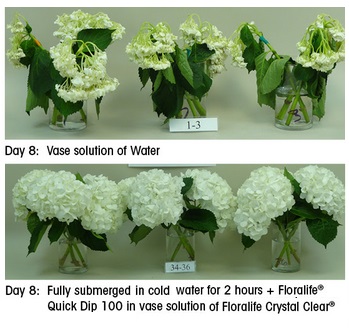
When you cut hydrangeas, it is highly recommended to put them in water immediately. This practice helps to preserve their freshness and prevents wilting. Hydrangeas are particularly sensitive because of their large blooms and the way they absorb water. Here are more details and considerations regarding this topic.
Why Watering Cut Hydrangeas is Essential
Putting cut hydrangeas in water is crucial for several reasons. It allows the flowers to hydrate, which is vital for maintaining their beauty and longevity. Without water, the cut stems can quickly absorb air, leading to a condition called embolism, which obstructs further water uptake.
- Hydration: Ensures the blooms stay plump and vibrant.
- Preventing Wilting: Reduces the chance of the flowers drooping and losing their shape.
- Longevity: Increases the lifespan of the cut hydrangeas in arrangements.
How to Prepare Hydrangeas for Water
To effectively prepare cut hydrangeas for water, it's essential to approach the process properly. First, make sure to cut the stems at a 45-degree angle under water, which helps to maximize water uptake.
- Use Sharp Shears: Clean cuts prevent damaging the stem.
- Cut Underwater: Reduces the risk of air entering the stems.
- Remove Lower Leaves: Keeps the water cleaner and prevents bacterial growth.
The Best Water Temperature for Hydrangeas
The temperature of the water can significantly affect how hydrangeas thrive post-cutting. Use room temperature or lukewarm water for optimal results, as it promotes better absorption.
- Avoid Cold Water: It can shock the flowers and inhibit opening.
- Warm Water: Encourages better hydration and nutrient uptake.
- Frequent Water Changes: Keeps the water fresh and oxygenated.
How Long to Keep Hydrangeas in Water
After cutting, hydrangeas should ideally be kept in water for at least a few hours before being arranged. This time allows the flowers to fully absorb water, enhancing their appearance and overall health.
- Let Them Soak: A few hours is sufficient for rehydration.
- Check for Signs of Hydration: Ensure they feel firm and fresh.
- Avoid Prolonged Soaking: Too long can lead to root rot if kept in shallow water.
Additional Care for Cut Hydrangeas
In addition to immediate hydration, cut hydrangeas benefit from ongoing care. Proper maintenance can keep the blooms looking fresh for a longer time.
- Recut Stems Regularly: Doing this every couple of days helps maintain water uptake.
- Use Flower Food: Nutrients in the food can extend freshness.
- Monitor for Pests: Check for any signs of insects or decay that could affect the flowers.
Questions from Our Readers
How do you take a cutting from a hydrangea?
To take a cutting from a hydrangea, select a healthy stem that is around 4 to 6 inches long and has several leaf nodes. Use a sharp, clean pair of pruning shears to cut just below a node, then remove the leaves from the bottom half of the stem to encourage rooting.
When is the best time to take hydrangea cuttings?
The best time to take hydrangea cuttings is during the late spring or early summer when the plant is actively growing. This timing increases the chances of successful root development and overall plant health.
See also:
Do I need to use rooting hormone for hydrangea cuttings?
While it's not always necessary, using a rooting hormone can significantly boost the likelihood of successful rooting for hydrangea cuttings. This helps to stimulate the root development process and can lead to stronger plants.
How long does it take for hydrangea cuttings to root?
Hydrangea cuttings typically take around 4 to 6 weeks to root, depending on the environmental conditions such as warmth and moisture. During this time, it's crucial to keep the cuttings in a humid environment to promote successful growth.

If you want to read more articles like Step-by-Step Guide: How Do You Take a Cutting from a Hydrangea for Successful Propagation, we recommend you check out our Shrubs category.
Leave a Reply
Related Articles