Step-by-Step Guide on How to Grow a Hydrangea from a Cutting for Beautiful Blooms
Hydrangeas are beloved for their stunning, vibrant blooms that can transform any garden into a floral paradise. Propagating these beautiful plants from cuttings is a rewarding and cost-effective way to expand your collection. In this step-by-step guide, we will explore the essential techniques and tips for successfully growing hydrangeas from cuttings. Whether you're a seasoned gardener or a beginner, this comprehensive approach will ensure you achieve lush, eye-catching flowers in no time. Prepare to delve into the world of hydrangeas and discover the joy of nurturing new plants from simple cuttings.
How to Grow a Hydrangea from a Cutting
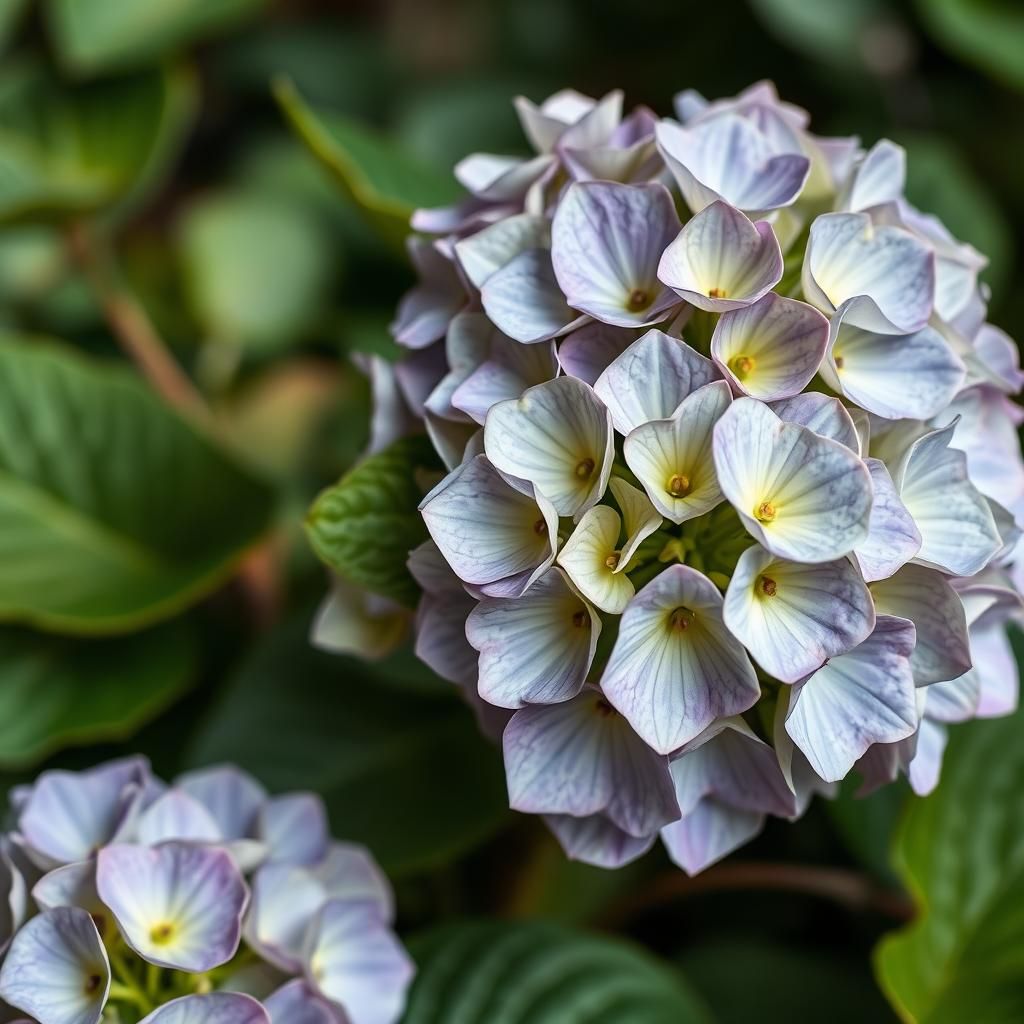
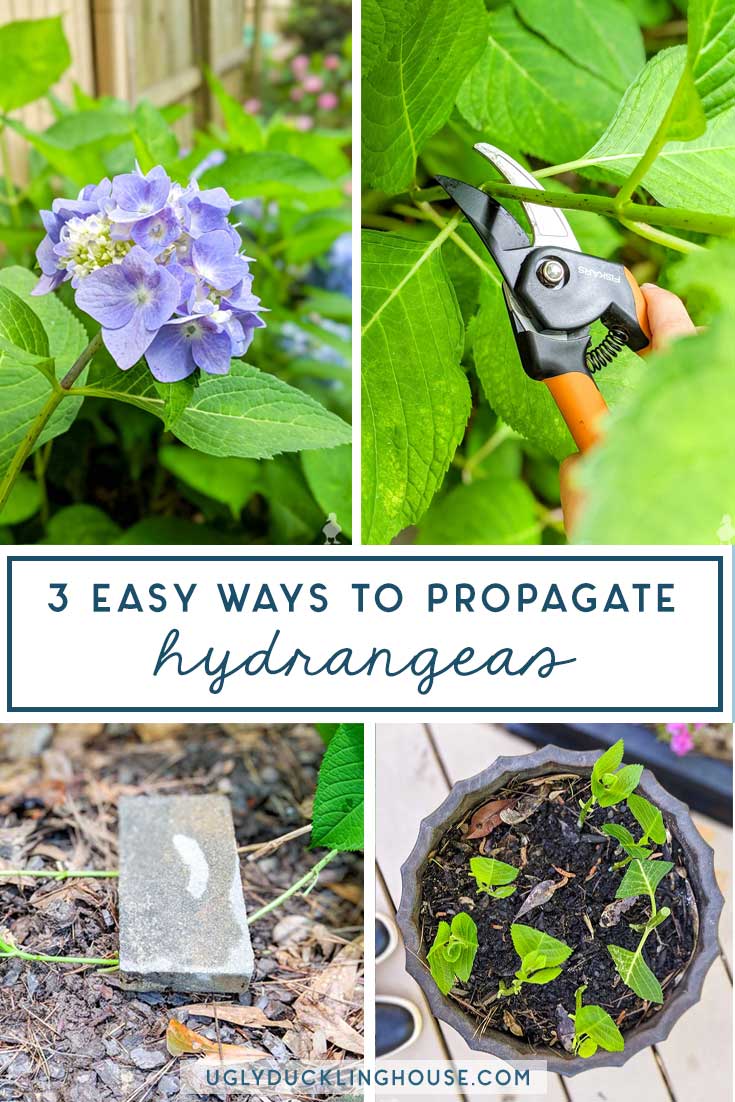
Growing a hydrangea from a cutting is a rewarding process that allows gardeners to propagate these beautiful flowering plants. The first step involves selecting a healthy stem from a mature hydrangea plant, ideally during the late spring or early summer when the plant is in active growth. Once you've cut the stem to about 4-6 inches in length, remove the leaves from the bottom half to reduce moisture loss. Dip the cut end in rooting hormone to encourage root development and plant it in a well-draining potting mix. Water the cutting thoroughly and keep it in a warm, humid environment to ensure successful root establishment. With patience and proper care, your hydrangea cutting should root within a few weeks, allowing you to enjoy your new plant.
Choosing the Right Cutting
When selecting a cutting for propagation, it’s essential to choose a sturdy stem that is healthy and disease-free. Look for a cutting that has at least two or three leaf nodes, as these nodes are where the roots will develop. The best time to take cuttings is during the growing season, preferably in early morning when the plant is well-hydrated. This timing helps ensure that the cutting remains fresh and viable during the rooting process.
Preparing the Cutting
After taking the cutting, preparation is crucial for successful propagation. Start by trimming the cutting to a length of about 4-6 inches, making the cut just below a leaf node. Remove any leaves from the bottom half of the stem to prevent decay when planted. It’s also advisable to cut the remaining leaves in half to reduce transpiration. These steps enhance the cutting's chances of developing strong roots.
Using Rooting Hormone
Applying rooting hormone to the cut end of the hydrangea cutting can significantly improve the chances of successful rooting. Rooting hormones work by stimulating root growth and can help the cutting establish itself more rapidly. Dip the end of the cutting into the hormone powder and gently shake off any excess before planting it in the prepared potting mix. This simple step can be a game-changer in the propagation process.
Creating an Ideal Environment
For optimal root growth, creating a suitable environment for the cutting is essential. Place the pot in a location that receives bright, indirect sunlight and maintains a warm temperature, typically between 65°F and 75°F (18°C to 24°C). To retain humidity, cover the pot with a plastic bag or a propagation dome, ensuring there's some air circulation to prevent mold. Regularly check the moisture level of the soil and water lightly as needed to keep it consistently moist, but not soggy.
Transplanting the New Hydrangea
After a few weeks, once your cutting has developed a robust root system, it will be ready for transplanting. Gently tug on the cutting to check for resistance, which indicates root growth. When transplanting, choose a pot that is slightly larger than the current root ball, and use quality potting soil. Gradually acclimate the young hydrangea to outdoor conditions if you plan to move it outside, starting with short periods of exposure to the elements.
| Step | Description |
|---|---|
| 1 | Select a healthy cutting from a mature plant. |
| 2 | Prepare the cutting by trimming and removing leaves. |
| 3 | Apply rooting hormone to stimulate root growth. |
| 4 | Place the cutting in a warm, humid environment. |
| 5 | Transplant the rooted cutting into a larger pot. |
Can you put hydrangea cuttings straight into soil?
Yes, you can put hydrangea cuttings straight into soil, but there are several factors to consider for successful propagation. This method can be effective, especially when done during the right season and with the appropriate care. Here’s a detailed breakdown of the process and considerations involved in planting hydrangea cuttings directly into soil.
Choosing the Right Time for Cuttings
The ideal time to take hydrangea cuttings is during the summer months, specifically late spring to early summer. During this period, the plants are actively growing, which improves the chances of successful rooting. Timing is crucial because:
See also:
- Optimal growth conditions: Warm temperatures and sunlight encourage root development.
- Foliage health: Healthy plants have stronger cuttings with better chances of survival.
- Less stress: Fresh cuttings taken from the current season are less stressed and more viable.
Preparing the Cuttings
Properly preparing your hydrangea cuttings significantly increases the success rate. Follow these steps to ensure they are ready for planting:
- Select healthy stems: Choose stems that are robust and disease-free, avoiding any that are wilted or damaged.
- Cut at the right angle: Make a clean cut below a leaf node at a 45-degree angle to promote better water absorption.
- Remove excess leaves: Trim away any leaves on the lower half of the cutting to reduce water loss through transpiration.
Soil Conditions for Propagation
The soil you choose for planting hydrangea cuttings is crucial for their success. Here are some important soil characteristics to keep in mind:
- Well-draining soil: Use a potting mix or a combination of peat, perlite, and sand to ensure drainage.
- Moisture retention: The soil should retain moisture without becoming waterlogged, as cuttings need consistent humidity.
- pH balance: Aim for slightly acidic soil (pH 6.0 to 6.8), which is ideal for hydrangeas.
Watering and Care After Planting
After planting the cuttings, they need proper care to establish roots successfully. Here are some watering and care tips:
- Maintain humidity: Cover the cuttings with a plastic bag or a mini greenhouse to keep humidity levels high.
- Water properly: Water only when the top inch of soil feels dry; over-watering can lead to root rot.
- Provide indirect sunlight: Place cuttings in a location with bright, indirect light to prevent scorching.
Signs of Root Development
Knowing when your hydrangea cuttings have developed roots is key to understanding when they can be transplanted. Look for these signs:
- New growth: Appearance of new leaves or buds is a strong indicator that roots are forming.
- Resistance during tugging: Gently pull on the cutting; if it resists, roots are likely established.
- Rooting time frame: Typically, cuttings take about 3-6 weeks to root, depending on conditions.
Can you cut hydrangeas and put them in water?
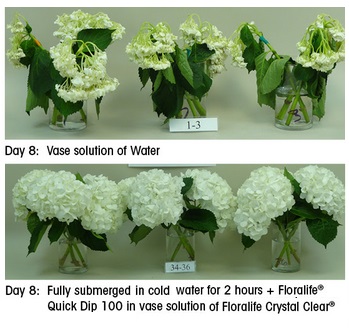
Yes, you can cut hydrangeas and put them in water. This practice is quite common for creating beautiful arrangements or improving the aesthetic value of your indoor spaces. When properly handled, freshly cut hydrangea blooms can last for several days or even weeks in water.
Benefits of Cutting Hydrangeas
Cutting hydrangeas can provide several advantages for your home decor and plant care:
- Enhanced Aesthetics: Freshly cut hydrangeas can add color and beauty to any room.
- Indoor Display: They enable you to bring the garden indoors, allowing you to enjoy their lush blooms up close.
- Potential to Root: In some cases, cuttings can be successfully propagated to create new plants.
Best Time to Cut Hydrangeas
The timing of cutting hydrangeas is crucial for their longevity in water:
- Early Morning: It is best to cut hydrangeas in the early morning when temperatures are cooler and plants are more hydrated.
- During Blooming Season: Aim to cut them during their peak bloom period for the fullest, most vibrant flowers.
- Dry Conditions: Avoid cutting them in overly humid conditions to reduce stress on the plant.
How to Cut Hydrangeas
Proper cutting techniques significantly influence how well your hydrangeas will thrive in water:
- Use Sharp Tools: Always use a clean, sharp pair of shears to make precise cuts, minimizing damage to the plant.
- Select Healthy Stems: Choose healthy, vibrant blooms for cutting, avoiding any wilted or discolored flowers.
- Cut at an Angle: Make cuts at a 45-degree angle to maximize water absorption after placing them in a vase.
Preparing Hydrangeas for Water
To ensure that hydrangeas thrive once cut and placed in water, follow these preparation steps:
See also: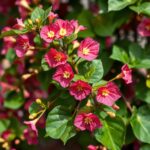
- Strip Leaves: Remove any leaves that will be submerged in the water to prevent rot.
- Re-cut the Stems: After cutting, re-trim the stems under water to remove air bubbles, promoting hydration.
- Use Fresh Water: Place the cut flowers in a clean vase filled with room temperature, fresh water.
Maintaining Cut Hydrangeas in Water
Keep your cut hydrangeas looking fresh and vibrant with proper maintenance:
- Change Water Daily: Refresh the water in the vase every day to prevent bacterial growth.
- Use Floral Food: Adding floral preservative can extend the lifespan of your hydrangeas.
- Avoid Direct Sunlight: Keep the arrangement out of direct sunlight and heat to minimize wilting.
Can you propagate hydrangeas from cut flowers?
Propagating hydrangeas from cut flowers is generally not considered a viable method for successful reproduction. While it might seem appealing to use beautiful cut flowers for propagation, the biological and physiological properties of cut flowers differ significantly from those of fresh, healthy stems used in traditional propagation methods. Here is a detailed exploration of this topic.
Understanding Hydrangea Propagation
Propagating hydrangeas primarily involves taking cuttings from healthy plants rather than using cut flowers. The cuttings should ideally be made from non-flowering stems to promote successful root development. These stems have the necessary nutrients and hormonal compositions required for rooting and growth.
- Types of Cuttings: There are typically three types of cuttings: softwood, semi-hardwood, and hardwood. Each has a specific ideal time for collection and may affect the success of propagation.
- Ideal Conditions: Environmental factors, such as temperature, humidity, and light, play crucial roles in the rooting process for hydrangea cuttings.
- Nutrient Needs: Effective propagation requires understanding the nutrient needs of cuttings, which vary from those of cut flowers.
Challenges with Using Cut Flowers
Using cut flowers for propagation presents several challenges. Once a flower has been cut, it starts to decompose and loses vital cellular functions. This significantly hampers the chances of rooting and developing into a new plant.
- Cellular Integrity: Cut flowers lack the cellular integrity needed for growth and are no longer connected to a nutrient source.
- Hormonal Changes: The hormonal balance in cut flowers shifts after they are severed, affecting the ability to form roots.
- Moisture Loss: Cut flowers tend to lose moisture quickly, leading to stress that hinders potential rooting.
Best Practices for Propagating Hydrangeas
To effectively propagate hydrangeas, focusing on the right stem cuttings and techniques is essential. This ensures that new plants have the best chance of thriving.
- Selecting Healthy Stems: Always choose healthy, disease-free stems from existing hydrangeas. Cut during the right season, typically in late spring or early summer for softwood cuttings.
- Correct Cutting Technique: Use clean, sharp scissors to make cuts right below a node, and remove any excess leaves to prevent rot.
- Rooting Hormones: Applying rooting hormone can significantly enhance the likelihood of successful rooting.
Alternative Propagation Methods
While cut flowers aren't suitable for propagation, there are other effective methods to multiply hydrangeas. These methods can yield more reliable results.
- Layering: This method involves bending a stem to the ground and covering part of it with soil, encouraging roots to form.
- Division: For certain types of hydrangeas, clumping varieties can be divided to create new plants, ideally done in spring or fall.
- Seed Propagation: Although more time-consuming and less reliable, starting from seeds is another method, although it may not yield true-to-type plants.
Conclusion on Cut Flower Propagation
While the concept of using cut flowers for propagation may seem attractive because of their beauty, practical experience and science indicate that it is not feasible. Sticking to traditional propagation techniques yields the best results for growing healthy hydrangeas.
Questions from Our Readers
What is the best time to take hydrangea cuttings?
The best time to take hydrangea cuttings is during late spring or early summer when the plant is actively growing. This timing ensures that the cuttings have a higher chance of rooting successfully since they will be taken from healthy, vigorous stems.
How do I prepare the cutting for propagation?
To prepare the cutting, select a healthy stem about 4 to 6 inches long, ensuring it has at least two nodes. Remove the lower leaves, leaving only a couple of leaves at the top, and make a clean cut just below a node to promote root growth.
See also:
What type of soil is best for growing hydrangeas from cuttings?
The ideal soil for propagating hydrangea cuttings is a well-draining potting mix that retains some moisture. A mix of perlite and peat moss or a specialized seed-starting mix can provide the necessary aeration and drainage for healthy root development.
How long does it take for hydrangea cuttings to root?
Hydrangea cuttings typically take about 4 to 8 weeks to root, depending on environmental conditions such as temperature and humidity. Keeping the cuttings in a warm, humid environment can speed up the rooting process and improve your success rate.

If you want to read more articles like Step-by-Step Guide on How to Grow a Hydrangea from a Cutting for Beautiful Blooms, we recommend you check out our Shrubs category.
Leave a Reply
Related Articles