Can You Plant a Frangipani Cutting Straight into the Ground? Essential Tips and Guidance
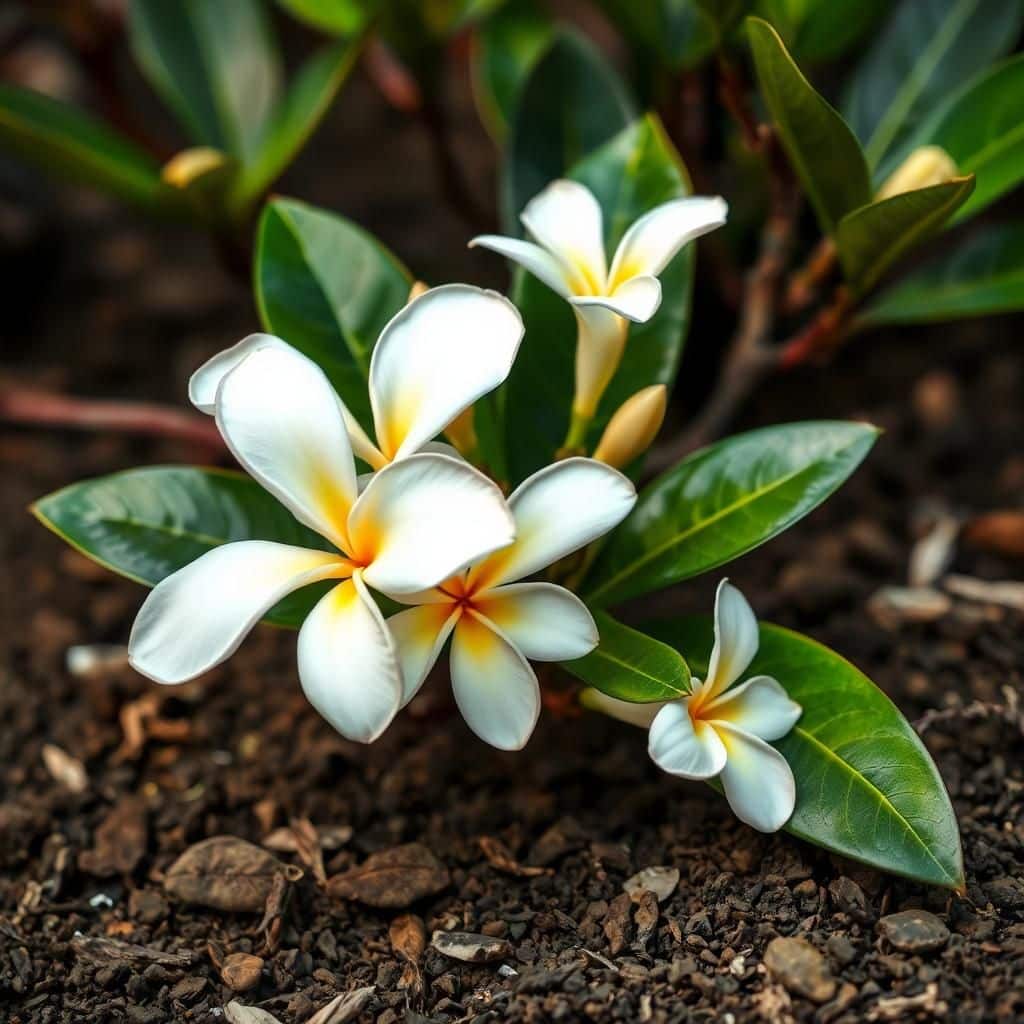
Frangipani, known for its stunning blooms and delightful fragrance, is a popular choice for both gardens and landscapes. Many gardening enthusiasts wonder if it's possible to plant a frangipani cutting directly into the ground for propagation. While this method can be successful, there are essential tips and best practices to ensure optimal growth and development. In this article, we will explore the techniques involved in planting frangipani cuttings, including the ideal conditions for rooting, soil preferences, and care instructions. Whether you're an experienced gardener or a novice, this guide will help you cultivate these beautiful plants with confidence.
Can You Plant a Frangipani Cutting Straight into the Ground?
Yes, you can plant a frangipani cutting straight into the ground, but it's important to follow certain steps to ensure successful growth. Frangipani, also known as plumeria, propagates easily from cuttings if you select healthy stems with leaves. Ideally, the cutting should be at least 12 inches long and should be allowed to dry out for a few days before planting, which helps to prevent rot. When you do plant it, ensure the soil is well-draining and place the cutting about 6 inches deep. Providing some shade for the first few weeks after planting can also foster better root development.
Choosing the Right Cutting
When selecting a cutting for planting, you should look for a healthy stem that is at least 12 inches long, has a few nodes, and is free of any disease or pests. The cutting should be taken from a mature frangipani tree to ensure that the genetic makeup is strong. It is also advisable to take the cutting from the current season’s growth, as these tend to root more successfully than older wood.
Preparing the Cutting
Before planting the cutting, it is crucial to prepare it properly. After cutting it from the plant, allow the cutting to dry in a shaded area for two to three days. This process is known as callusing, where the cut end dries out and seals, reducing the risk of rot once it's planted in the soil. The calloused end should be kept dry until you are ready to plant it, as excessive moisture can lead to rotting before it has a chance to root.
Soil Requirements
Frangipani cuttings thrive in well-draining soil. It's best to use a mix of native soil and sand or perlite to promote drainage. Heavy or compacted soils can trap water, leading to root rot and other issues. The ideal pH level for potting soil should be slightly acidic to neutral (between 6.0 and 7.5). You can also amend the soil with compost to provide additional nutrients but ensure it does not retain too much moisture.
Watering Guidelines
Once you have planted the frangipani cutting in the ground, it is important to water it appropriately. During the first few weeks, water the area lightly to keep the soilmoist, but not soggy. After this establishment period, you should reduce watering significantly, allowing the soil to dry out between waterings. Overwatering is one of the most common mistakes and can lead to the cutting failing to root successfully.
Sunlight and Location
The location where you plant the frangipani cutting is vital for its growth. Frangipanis require full sun, so choose a spot that receives at least 6 hours of direct sunlight daily. It’s important to avoid shaded areas or spots where water might pool after rain. A sunny and warm location will not only help with the successful rooting of the cutting but also encourages healthy leaf growth and beautiful blossoms when it matures.
| Aspect | Recommendation |
|---|---|
| Cutting Length | At least 12 inches |
| Soil Type | Well-draining soil with sand or perlite |
| Watering Frequency | Lightly water until established, then reduce |
| Sunlight | Full sun for 6+ hours |
| Callusing Time | 2-3 days before planting |
Can you grow frangipani from a branch cutting?

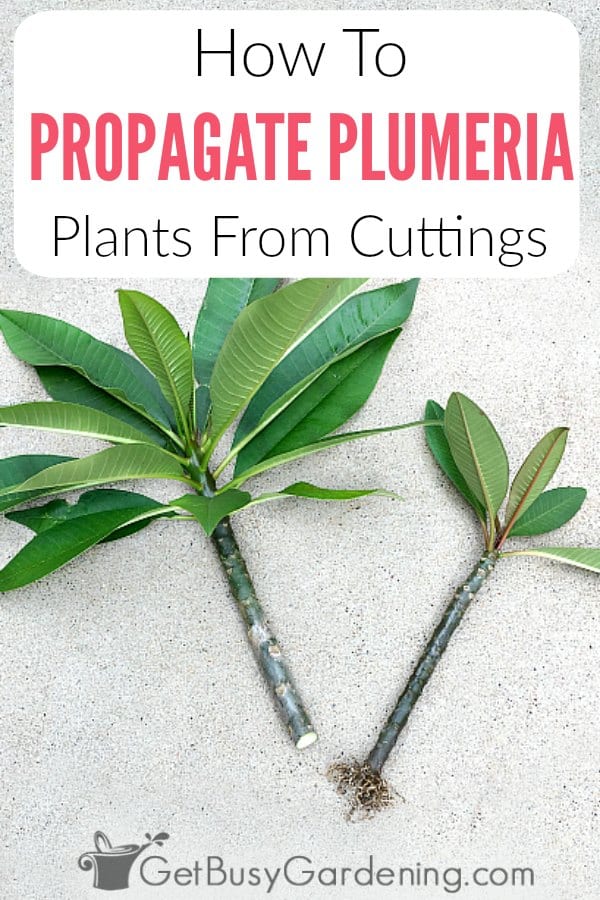
Yes, you can grow frangipani from a branch cutting. The process is relatively straightforward and is a popular method of propagation for this tropical plant, known for its fragrant flowers. Branch cuttings typically need to be taken from a healthy parent plant, preferably during the warmer months when the plant is actively growing. Here’s a step-by-step guide on how to successfully propagate frangipani from a cutting.
Choosing the Right Cutting
When propagating frangipani, selecting the right cutting is crucial. A healthy cutting should be:
- Healthy: Look for a branch that is free of disease and pests.
- Size: A cutting should typically be about 12 to 18 inches long.
- Age: The best cuttings come from mature wood, around one to two years old.
Preparing the Cutting
Once you have chosen the appropriate cutting, preparation is essential for successful propagation. Follow these steps:
- Cutting Angle: Make a clean cut at a 45-degree angle to increase the surface area for rooting.
- Drying: Allow the cutting to dry for a few days in a shaded location. This helps form a callus over the cut end.
- Hormone Application: Optional but beneficial, apply rooting hormone to the cut end to promote faster root growth.
Planting the Cutting
After preparing the cutting, the next step is to plant it correctly for optimal growth:
- Soil Type: Use a well-draining soil mix, such as a combination of potting soil and sand.
- Depth: Plant the cutting at least one third of its length into the soil, ensuring stability.
- Watering: Water lightly after planting but avoid over-watering, as excessive moisture can lead to rot.
Caring for the Cutting
Once your frangipani cutting is planted, ongoing care is essential for successful propagation:
See also:
- Light Requirements: Place the cutting in a warm location with partial sun, as it thrives in bright but indirect light.
- Watering Schedule: Water the cutting regularly, but allow the soil to dry out between watering sessions.
- Humidity: If conditions are too dry, consider creating a mini greenhouse effect by covering the cutting with a plastic bag (punctured for airflow).
Transplanting the Growing Cutting
As the cutting develops roots and begins to grow, you may need to transplant it for better growth in the future:
- Root Development: Confirm root development by gently tugging on the cutting – resistance indicates root growth.
- Choosing a Pot: Select a larger pot with drainage holes to accommodate the growing plant.
- Transplanting Care: When transplanting, handle the roots carefully to avoid damage and continue providing proper care in its new environment.
Can you plant plumeria cuttings directly in the ground?
Yes, you can plant plumeria cuttings directly in the ground, provided certain conditions are met to ensure successful rooting and growth. Plumeria, also known as frangipani, thrives in warm, tropical climates, and while it is possible to plant cuttings directly, there are key factors to consider for optimal results. Here are some important aspects to keep in mind when planting plumeria cuttings in the ground.
Choosing the Right Time for Planting
When planting plumeria cuttings, timing plays a crucial role in their successful establishment.
- Spring is generally considered the best season for planting as temperatures are warmer, which encourages root development.
- In areas with mild winters, you can also plant in early summer, ensuring the cuttings are not exposed to cold temperatures.
- Make sure to avoid planting during the rainy season, as excessive moisture can lead to rot.
Preparing the Soil
Soil preparation is fundamental to ensure cuttings adjust well after planting.
- Use well-draining soil, preferably a sandy or loamy mix, to prevent water retention that can cause root rot.
- Amend the soil with organic matter such as compost to improve nutrient availability.
- Before planting, consider testing the soil pH, ideally between 6.0 and 7.5 for optimal growth.
Cutting Preparation and Planting Technique
How you prepare the cutting before planting is essential for its success.
- Choose healthy, mature cuttings at least 12 inches long, preferably with a few leaf nodes.
- Allow the cuttings to dry and callous for about a week, which reduces the risk of disease.
- Plant the cuttings about 2-3 inches deep in the ground, ensuring that they are vertical and stable.
Watering and Care Post-Planting
Proper watering and care immediately after planting will help the cutting establish roots.
- Water the soil lightly after planting, ensuring it is moist but not soggy.
- For the first few weeks, water sparingly, allowing the top inch of soil to dry out between watering.
- Once rooted, gradually increase watering frequency, adapting based on the environmental conditions.
Monitoring Growth and Pests
Once planted, observing the health of your plumeria cuttings is key to ensuring they thrive.
- Look out for signs of pests like aphids and mealybugs, which can weaken the plant.
- Monitor the cutting for any signs of wilting or yellowing leaves, which indicate stress or poor root establishment.
- Fertilize lightly with a balanced fertilizer after about a month, but avoid over-fertilizing, as this can damage new roots.
Can I put plant cuttings straight into the ground?

To address the question of whether you can put plant cuttings straight into the ground, it's important to consider several factors. While it is possible to place cuttings directly into the soil, the success rate can vary depending on the type of plant, the environmental conditions, and the preparation of the cuttings. Here are some details to consider:
Understanding Plant Cuttings
Cuttings are pieces of a plant that are taken to propagate new plants. They can be taken from stems, leaves, or roots and can be categorized based on their source. Understanding the type of cutting you are using is crucial for successful planting.
- Stem Cuttings: These are the most common type and typically perform well. They should ideally have a few leaves and a node, which is where roots may form.
- Leaf Cuttings: Generally taken from larger leaves, these can be trickier since they require specific conditions for rooting, often needing humidity.
- Root Cuttings: These are sections of roots taken to grow new plants and can also be directly planted underground.
Timing for Planting Cuttings
When you plant cuttings, the timing plays a significant role in their success. You should consider the season and environmental conditions that can affect growth.
- Spring: The ideal time for most cuttings, as the weather is warming up and plants are entering their active growth phase.
- Summer: Good for softwood cuttings, but ensure adequate moisture as it can be hot and dry.
- Fall/Winter: Generally not recommended as many plants are dormant, making it harder for cuttings to establish roots.
Soil Preparation for Cuttings
Proper soil preparation is essential for helping cuttings establish roots. The soil should provide a suitable environment with the right balance of moisture, nutrients, and aeration.
See also:
- Well-Draining Soil: Use a mix of potting soil and sand or vermiculite to ensure good drainage.
- Moisture Retention: The soil should hold enough moisture without becoming waterlogged, which can lead to rot.
- Nutrient-Rich: While cuttings primarily rely on the stored energy in the stem or leaf, a fertile environment can help support new growth once roots begin to develop.
Watering and Care for Cuttings
Once you have planted the cuttings, proper watering and care methods are critical to their survival.
- Consistent Moisture: Water the cuttings regularly to keep the soil moist, but never soggy.
- Humidity: Keep humidity levels high, especially for leaf cuttings, which may benefit from a plastic cover or misting.
- Sunlight: Provide indirect sunlight to avoid stressing the cuttings while they establish roots.
Potential Risks of Direct Planting
While planting cuttings directly into the ground is feasible, there are inherent risks that you should be aware of.
- Failure to Root: Many cuttings may fail to root when directly planted due to unsuitable conditions.
- Pests and Diseases: Soil-borne pests and diseases can attack newly planted cuttings, hindering their growth.
- Environmental Stress: Direct exposure to wind, intense sun, or fluctuating temperatures can stress the cuttings and reduce their chances of survival.
How do you transplant a large frangipani cutting?
To transplant a large frangipani cutting successfully, follow these detailed steps to ensure that the plant thrives in its new environment.
Preparation of the Cutting
Before you transplant a large frangipani cutting, it is crucial to prepare the cutting properly. The most essential steps are:
- Choose the Right Cutting: Select a healthy cutting that's about 12 to 18 inches long and has several nodes.
- Let it Callous: Allow the cutting to dry for a few days in a shaded area so that the cut end can form a callous, which helps prevent rot.
- Prepare the Soil: Use a well-draining potting mix, ideally designed for succulents or cacti, to promote drainage.
Choosing the Right Location
Selecting an appropriate location is vital for the healthy growth of your frangipani. The right spot ensures that the plant receives adequate sunlight and protection from harsh conditions:
- Sun Exposure: Frangipanis thrive in full sun, so choose a location that receives at least 6 hours of direct sunlight.
- Wind Protection: Place the cutting in an area that is sheltered from strong winds, which can damage the plant.
- Drainage Considerations: Ensure that the chosen location doesn’t retain too much water, as frangipanis are susceptible to root rot.
Planting the Cutting
Once the preparation and location have been assessed, it’s time to plant your frangipani cutting. This is a critical step that will influence the plant's stability:
- Digging the Hole: Make a hole that is deep enough to support the cutting, generally about 6 to 8 inches deep.
- Placing the Cutting: Insert the calloused end of the cutting into the hole, burying it about halfway while ensuring the top remains exposed.
- Firming the Soil: Gently pat down the soil around the cutting to stabilize it and eliminate air pockets that could cause instability.
Watering After Transplanting
Watering is essential after transplanting to help your frangipani establish its roots. The right approach will foster healthy growth without causing water-related issues:
- Initial Watering: Water the cutting lightly right after planting to settle the soil around it.
- Avoid Over-Watering: Allow the top inch of the soil to dry out before watering again. Too much water can lead to rot.
- Monitor Conditions: Adjust your watering schedule based on environmental conditions, such as humidity and temperature.
Post-Transplant Care
After the transplant, ongoing care will significantly impact the success of your frangipani cutting. Proper attention in the weeks following the transplant is key:
- Fertilization: Wait about 4-6 weeks before applying a slow-release fertilizer to provide the necessary nutrients.
- Pruning: Remove any damaged or dead leaves to promote healthier growth and air circulation.
- Pest Control: Regularly check for pests and diseases, and take immediate action if any issues arise.
Questions from Our Readers
Can you plant a frangipani cutting straight into the ground?
Yes, you can plant a frangipani cutting straight into the ground, but it's essential to prepare the cutting properly first. Allow the cutting to dry for a few days until the ends callous over, which helps prevent rot when planted in the soil. Make sure the soil is well-draining and put the cutting in a location that receives plenty of sunlight.
What is the best time to plant frangipani cuttings?
The best time to plant frangipani cuttings is during the late spring or early summer, as this is when the plant is most actively growing. This season provides the ideal conditions of warm temperatures and ample sunlight that support healthy root establishment and growth.
How deep should I plant a frangipani cutting?
When planting a frangipani cutting, aim to bury it about 4 to 6 inches deep in the soil. Ensure that part of the cutting remains above the ground to allow for photosynthesis. Proper depth helps secure the cutting while promoting effective root development.
See also:
How often should I water frangipani cuttings after planting?
After planting, it's important to water your frangipani cuttings lightly but consistently. Water them every week, allowing the soil to dry out between watering sessions, as overwatering can lead to root rot. Once the cutting establishes roots, you can reduce watering to every few weeks.

If you want to read more articles like Can You Plant a Frangipani Cutting Straight into the Ground? Essential Tips and Guidance, we recommend you check out our Landscaping category.
Leave a Reply
Related Articles